TensorFlow - 学習精度を上げるために画像加工して増やす
参考:Images 上記を見ると色々な加工関数があるんですね。デコードエンコードも色々便利そうなのがあるんですね。
TensorFlowのチュートリアル「Convolutional Neural Networks」で、cifar10の画像を学習精度を上げるために画像を色々加工して増やしています。何をしていて、どうやればいいのか確認します。ソースコードはここです。
Readクラスでファイルから画像・ラベルデータを取り出した後に下記をしています。この5つの関数達を試していこうと思います。
# Randomly crop a [height, width] section of the image.distorted_image = tf.random_crop(reshaped_image, [height, width, 3])
# Randomly flip the image horizontally.distorted_image = tf.image.random_flip_left_right(distorted_image)
# Because these operations are not commutative, consider randomizing# the order their operation.distorted_image = tf.image.random_brightness(distorted_image, max_delta=63)distorted_image = tf.image.random_contrast(distorted_image, lower=0.2, upper=1.8)
# Subtract off the mean and divide by the variance of the pixels.float_image = tf.image.per_image_standardization(distorted_image)
すでに同じことをやってるサイトを発見しました。 参考:画像の水増し方法をTensorFlowのコードから学ぶ
なんか、上記5つの関数のうち最後の1つが参考サイトだと違う。参考サイトだとホワイトニングしている。参考サイトのおかげで答えが分かりましたが、一応自分でも試しておきます。
tf.random_crop
コード
import tensorflow as tfimport numpy as npfrom PIL import Image
height = 300width = 400
fpath = './img/sample_pic.jpg'jpg = tf.read_file(fpath)img = tf.image.decode_jpeg(jpg, channels=3)cropped = tf.random_crop(img, [height, width, 3])
with tf.Session() as sess:    coord = tf.train.Coordinator()    threads = tf.train.start_queue_runners(coord=coord)
    for i in range(4):        img = sess.run(cropped)        print(img.shape)        Image.fromarray(np.uint8(img)).save('./img/img{}.jpg'.format(i))
結果 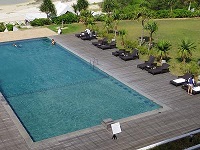


seek設定してないけどランダムになった。seekを明示した場合、seekが同じだと同じ結果になるってことらしい。
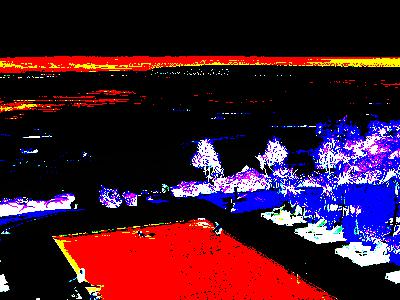
tf.image.per_image_standardization
これが参考サイトにない。その代りホワイトニングがなくなっている。 コード
height = 300width = 400
fpath = './img/sample_pic.jpg'jpg = tf.read_file(fpath)img = tf.image.decode_jpeg(jpg, channels=3)cropped = tf.random_crop(img, [height, width, 3])result = tf.image.per_image_standardization(cropped)
with tf.Session() as sess:    coord = tf.train.Coordinator()    threads = tf.train.start_queue_runners(coord=coord)
    for i in range(4):        img = sess.run(result)        print(img.shape)        Image.fromarray(np.uint8(img)).save('./img/img{}.jpg'.format(i))
結果は恐ろしい色合いになった。 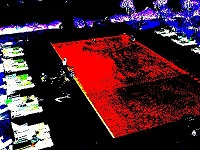

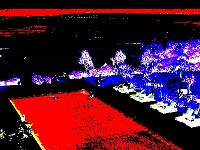
こんな恐ろしい画像から学習しているんだなー。
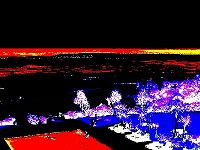
チュートリアルの5関数を適用してみる
コード
fpath = './img/sample_pic.jpg'jpg = tf.read_file(fpath)img0 = tf.cast(tf.image.decode_jpeg(jpg, channels=3), tf.float32)img1 = tf.random_crop(img0, [height, width, 3])img2 = tf.image.random_flip_left_right(img1)img3 = tf.image.random_brightness(img2, max_delta=63)img4 = tf.image.random_contrast(img3, lower=0.2, upper=1.8)img5 = tf.image.per_image_standardization(img4)
with tf.Session() as sess:    coord = tf.train.Coordinator()    threads = tf.train.start_queue_runners(coord=coord)    for i in range(4):        img = sess.run(img5)        print(img.shape)        print(img)        Image.fromarray(np.uint8(img)).save('./img/img{}.jpg'.format(i))
結果